Remove entry in ~/.ssh/known_hosts
This is required if host key replaced in target server.
ssh-keygen -R HOSTNAME
ssh-keygen -R IP_ADDRESS
Computer is miraculous!
This is required if host key replaced in target server.
ssh-keygen -R HOSTNAME
ssh-keygen -R IP_ADDRESS
kubeadm token create --print-join-command
After cloned Ubuntu VM, some tasks are required.
/etc/hostname
/etc/hosts
rm /etc/ssh/ssh_host_*
dpkg-reconfigure openssh-server
After run init, following error was occurred.
dial tcp 127.0.0.1:10248: connect: connection refused.
Run following command to reinit kubernetes master or worker
sudo mkdir /etc/docker
cat <<EOF | sudo tee /etc/docker/daemon.json
{
"exec-opts": ["native.cgroupdriver=systemd"],
"log-driver": "json-file",
"log-opts": {
"max-size": "100m"
},
"storage-driver": "overlay2"
}
EOF
sudo systemctl enable docker
sudo systemctl daemon-reload
sudo systemctl restart docker
sudo kubeadm reset
sudo kubeadm init
Join cluster
kubeadm join ...
Label it as worker
kubectl label node kworker1 node-role.kubernetes.io/worker=worker
Following messages are printed to create pod network.
You should now deploy a pod network to the cluster.
Run "kubectl apply -f [podnetwork].yaml" with one of the options listed at:
https://kubernetes.io/docs/concepts/cluster-administration/addons/
Install Weave Net for NetworkPolicy.
kubectl apply -f "https://cloud.weave.works/k8s/net?k8s-version=$(kubectl version | base64 | tr -d '\n')"
Kubernetes kubeadm init fails due to dial tcp 127.0.0.1:10248: connect: connection refused
kubernetes cluster master node not ready
Weave Net for NetworkPolicy
There are many reasons that some dangling disk images files exists in Proxmox folder. To remove them from the Proxmox storage, might not be possible, and they might be not shown in VM hardware items as well.
This is to fix the following issues
qm rescan
If rescan can not fix the issue, rename the old disk or disk folder, then restart VM to confirm the disk file is not necessary. Then remove disk.
After Proxmox installed, I also migrate TrueNAS VM to Proxmox as VM for both Ubuntu VM and Windows 10 VM.
The zpool volume device is located in /dev/zvol/<zpool_name>/<zvol_name>
. Create disk image using following command.
dd if=/dev/zvol/pool0/server-xxxxxx of=/tmp/server.raw bs=8m
scp ...
Another way to transfer
dd if=/dev/zvol/.... bs=8192 status=progress | ssh root@proxmox 'dd of=....raw bs=8192'
or
dd if=/dev/zvol/.... bs=8192 status=progress | gzip -1 - | ssh root@proxmox 'dd of=....raw.gz bs=8192'
or
dd if=/dev/zvol/.... bs=8192 status=progress | gzip -1 - | ssh root@proxmox 'gunzip - | dd of=....raw.gz bs=8192'
Create a VM with OVMF (UEFI) if TrueNAS VM is using UEFI
Remove VM disk
Use following command to import disk
qm importdisk <vm_id> <raw_file> <storage_id>
For example
qm importdisk 100 vm.raw ds1812-vm_nfs1
Go to VM hardware page
Select unused disk and click Add button to add disk into VM
Select Options => Boot Order to check the iscsi/sata controller
Export Virtual Machine from TrueNAS and Import VM to Proxmox
Migration of servers to Proxmox VE
Additional ways to migrate to Proxmox VE
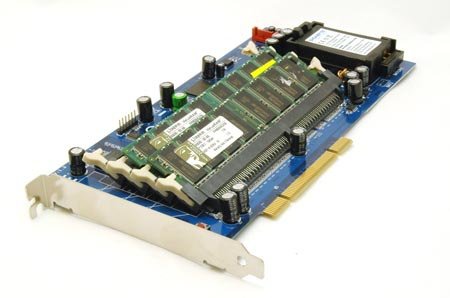
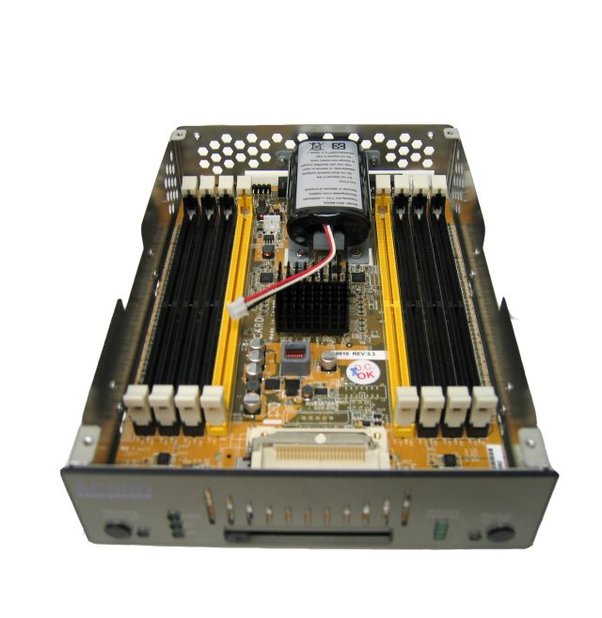
Here, talking about physical RAM disk, not the software version.
There are three types interface for physical RAM disk, one is PCIe interface, another SATA, or the external drive.
There are two controllers on such board, one is to simulate device, second one is to address the RAM array.
Following web page shows the design of such board
The way we made an external PCIe RAM disk based on the DDR memory Cache
Testing result
Full overview of the new DDR RAM disk
SATA Interface
PCIe Interface
External Drive
If a stick of RAM is given a constant supply of power, could it be used as a permanent storage?
Veritas Cluster configuration document.
Veritas Cluster Cheat sheet
VCS cheat sheet -complete
Veritas Cluster Cheat sheet (Cache)
Recently, I got such error quite often when using google reCaptcha v3. To allow me login without reCaptcha verification, login to WordPress server, and rename plugin folder advanced-nocaptcha-recaptcha
, then login normally. After login, rename back the folder.
When downloaded video file, there could be a reason requires replace audio due to different language, etc.
For example, extract audio from with_audio.mp4 and save audio as file output-audio.acc
ffmpeg -i with_audio.mp4 -map 0:a:0 -c copy output-audio.aac
ffmpeg -i with_audio.mp4 -vn -acodec copy output-audio.aac
Following command give two inputs, first one is video file (index 0), second one is audio file (index 1). The first -map
means getting first input (index 0) as video in first output (out_index 0), and the second -map
means getting second input (index 1) as audio in first output (out_index 0).
ffmpeg -i without_audio.mp4 -i output-audio.aac -c:v copy -map 0:v:0 -map 1:a:0 new.mp4